Got the driveshaft done yesterday! The car seems better, no creaking or knocking on corners which is good, but it's also a good peice of mind having worried for the last couple of weeks that the driveshaft was going to give, and then be left somewhere i didn't want to be left with a car that wouldn't go!
In my last post i mentioned about the prices at my local garage jumping up by £50! Well i phoned them last thursday and told them i had a quote for £120 and i'd like to book it in! They didn't say anything and that is what i eventually paid!
No other problems jumped out at them apart from the exhaust which i know is blowing. Not sure if they were punting for work but they said that the flange between the front section & the catalytic converter has gone and they reckon i'd need a new 'cat' on there....hmm i think not! Next time i get under the car, ill have a look at the flange. Maybe i can purchase a flange joint thingy from a shop and just replace it to seal up the hole.
Not much else to report. im still hankering for more power and the thoughts of dropping a 1.6 16v GTi engine into the pug is still growing on me!
Ta ta for now!
Tuesday, December 13, 2005
Thursday, December 08, 2005
That damn driveshaft...
On my last post here, i mentioned that my driveshaft was knackered. Well that was about 2 weeks ago. I phoned up the garage where i had my cambelt changed, and they quoted me £120. hmmm, bit pricey and being so close to xmas aswell but luckily, i got a bit of money for some work i had done and that covered it. So last monday, i phoned up the garage again to get a quote for the same works and was told it would be £170! £50 price rise in 2 weeks?! that's soo wrong! I know of another garage which is around the corner from my house. Phoned them, and they said they wouldn't be able to fit me in until after xmas!.. Ouchy! So with all these setbacks, i thought i'd order a driveshaft from GSF or eurocarparts for £50 and then fit it myself.
Anyway, i logged onto the PGAC today where one of the users had posted some images of his 205, which had more or less eaten his driveshaft and the damage looked a bit horrible. So i phoned up the garage again and told them that i had phoned up 2 weeks ago and was quoted £120 for the replacement driveshaft + fitting. It's booked in for monday, and it's for £120. Bonus! I'll finally get the driveshaft sorted!
Last weekend, i popped round to my dad's to do a bit of work on the car. Not much done, but we did have a look at the radiator, which has still not leaked. So whatever the problem was, it's gone! We also looked at the doors as they have been creaking, squeeking and banging for the last couple of months. With a bit of WD40 & Grease, they now open and close with ease! Problem with that is though that im used to giving the door a bit of welly to open it, whereas now, it opens with minimal force, so i've very nearly wrecked both doors by swinging them open into parked cars! Gotta watch that!
We also fixed my dodgy rear window wiper & washer. Basically, the washer didnt work and the wiper would only wipe the sides of the rear windscreen, and leave the central bit covered in water / dust or whatever was on there. After looking at it, my dad quickly realised that the wiper wasn't actually touching the window in the middle because the wiper arm had ceased. So out came the WD40 again which loosened it up a treat and it now cleans the whole rear screen! As for the washer, that seemed to be blocked. A pin up the shoot fixed that. But the washer housing has split. So now when i turn on the rear washer, it sprays in 3 different directions, one on the window, one straight out behind the car, and one straight upwards! Could be useful if someone's tailgating me ;)
Monday, November 21, 2005
it get's worse...
Going on from my post on Friday about a few problems with the 106. On Saturday, i took the car back to Rapid-Fit in Lowestoft to get the funny sound looked at. My original thought was a warped disc, and seeing as Rapid-fit done the brakes 8 months back, if it was the problem, they could fix it under waranty!... Alas, it wasn't a warped disc. The dodgy sound is coming from a knackered driveshaft knuckle. NOT what i wanted to hear. Other problems that the nice mechanic spotted included:
The leaky radiator is playing games still. It hasn't leaked in almost a week after releiving itself of it's contents all over the road last monday. In the 2 day's following, i put in 5 litres of water and i could see that it was leaking, however, as i said, it hasn't leaked since last wednesday, and that's after nearly 400 miles of driving. How queer. Never-the-less, my dad has yet again prevailed, and has a shiny new radiator sitting at his house waiting for me.
Lastly, over the weekend, BWS & I fitted a head unit into the Scooby. It was quite hard to do. Halfords didn't have an ISO connector to fit the scooby, so we hard-wired the lot and it worked! Also, the scooby has a double din socket (twice the size of a normal head unit). So we had to fabricate a facia panel to make the whole install look a hell of a lot nicer! Again, Halfords couldn't help us on a facia panel, so off to wickes we went, and purchased some materials to create our own. I don't have pictures, but the job was a good'un!
- A blowing coming from the front part of the exhaust system.
- Excessive travel in the handbrake. Either requires welding or new shoes in the rear drums.
- A bald tyre (now rectified).
The leaky radiator is playing games still. It hasn't leaked in almost a week after releiving itself of it's contents all over the road last monday. In the 2 day's following, i put in 5 litres of water and i could see that it was leaking, however, as i said, it hasn't leaked since last wednesday, and that's after nearly 400 miles of driving. How queer. Never-the-less, my dad has yet again prevailed, and has a shiny new radiator sitting at his house waiting for me.
Lastly, over the weekend, BWS & I fitted a head unit into the Scooby. It was quite hard to do. Halfords didn't have an ISO connector to fit the scooby, so we hard-wired the lot and it worked! Also, the scooby has a double din socket (twice the size of a normal head unit). So we had to fabricate a facia panel to make the whole install look a hell of a lot nicer! Again, Halfords couldn't help us on a facia panel, so off to wickes we went, and purchased some materials to create our own. I don't have pictures, but the job was a good'un!
Friday, November 18, 2005
It's all gone wrong.
1) The front passanger brakes are making a very strange noise whilst braking. Warped disks?... I'll have to get that looked at!
2) I have a hole in my radiator. It's leaking water and it's not funny when you have no heating.
3) I have to scrape ice off the car... that's not fun either.
2) I have a hole in my radiator. It's leaking water and it's not funny when you have no heating.
3) I have to scrape ice off the car... that's not fun either.
Monday, November 07, 2005
Have i seen the light?...
H & I went to suffolk at the weekend for a fireworks night party. I didn't take any photo's, but got a lot of footage on the vid-cam! So once i work out how to get it on the PC i'll be sorted. We also went up to suffolk to see their new motor. I tell you what, it's a lot of motor for not a lot of money!
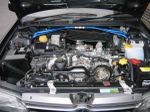
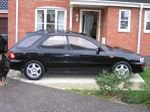
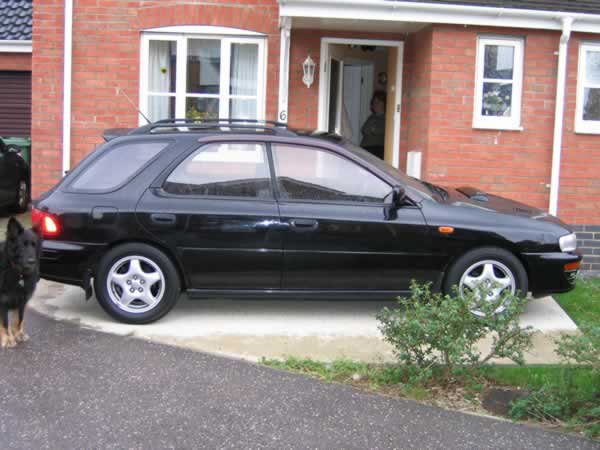
They have bought a Subaru Impreza WRX Sti wagon for a shade of £2,500, which is a bargain if ever i saw one. It's automatic (hmm), It's a turbo (woooo), and it's all wheel drive so damn fun!. I was a bit apprehensive to drive it and didn't really want to drive it to be honest as i know what my driving's like and with that much power (around 250bhp) it could get quite messy. Not only that, but i've never driven an automatic before, so the last thing i wanted to do was crash it!
But we found a quite road and parked up. I was handed the keys... EEEP!... So anyway, got in the drivers seat, took a crash course on automatics, and then set about having a quick drive of it. I didnt want to push it so i ended up creeping along the road getting used to the car, but BWS was in the passanger seat egging me on saying "at this rate, we'll be home for christmas"... Sooo... I put my foot down and oh... my.... god..... that thing flies like s**t off a shovel. Went flying up this quiet road, round a bend to be met by a tractor so promptly slowed down (tested the brakes... they were good!). I Then overtook the tractor at an alarming rate (as the scooby has the power to do this!) before getting to a round-about, turning around, and heading back towards the car park!.
I'd seriously love one of these cars. They are not pretty to look at by any stretch of the imagination, but the power more than makes up for it and it was a real pleasure to drive. The car feels solid on the straights, and feels as if it is on the rails when going round the corners. The power delivery is nice and smooth and certainly plants you into your seat when you accelerate. The turbo-lag is a bit of a let-down. You put your foot down and you have to wait for the power to kick in, but all in all.. it's a damn fine motor. And i'd be cracking open the money pot and searching for one if it hadn't been for the insurance. The cheapest quote i got was £1650!... WOW.
Anyways, here is the scooby!


On another note, the pug is a bit worse for wear, im sure the exhaust or the cat has knackered as it's a bit slow on the up-take and rather noisy to boot.... eeeesh!
Thursday, November 03, 2005
del.icio.us links
Last week, i heard about a new browser which has hit the market. Well, i say that, it's still in it's pre-release state, and not overly stable, but Flock 0.5 is new none-the-less, and i like new stuff.
Flock is built on the Firefox browser, and is geared more towards sharing. So it comes built in with del.icio.us favourites rather than 'normal' bookmarks. Whatever you bookmark on flock, it's automatically stored on del.icio.us. Quite a nifty idea i thought. Only problem being is that i didnt have a del.icio.us account. So i promptly signed up (it's free, and we all like freebies!) and to be honest, i quite like the new linking system. It also uses Flickr to share photo's.
As for flock, it's quite cool. I wont be using it just yet. I think i'll stick with firefox, but i will definatly keep an eye on Flock as it could be good in the future.
Anywho, whilst looking through the del.icio.us website, i found the "linkroll" which is a bit of code you stick on your website and it let's other people see the bookmarks you've saved. So i've added that to the sidebar on the right!... Spread the love, share the love. you know how it is!
Other than that, im thinking about moving the blog again (lol), i also think the exhaust is playing up on the pug as it seems quite noisy and it also appears to have lost some power!... Maybe another seal has gone... maybe i should go for a proper exhaust rather than a crappy kwikfit jobby.
Oh, and i get to see 'BWS's' scooby on Saturday. Quite looking forward to that :)... piccies soon come!
Monday, October 24, 2005
The Car's back, im back.... We're back!
Soo... the last post was before i went on holiday with "H". It was our first holiday together alone, and we had a great time. It may seem boring to you, but we both jumped in the car last Monday, and headed for Teignmouth, in Devon for the week. H had been there before as she has some relatives who live there, but i had never seen it, and my god, the scenery is fantastic! And so are the roads. If you've never been to Devon, the place is full of hills. It always feels like your walking up-hill! It is crazy, but the roads, as i said, were fantastic. Lot's of country lanes, winding up a hill, and then back down the other side. No pavements, and just tree's & banks either side of the road. It was a shame it was raining & wet though, i didnt want to push the car too fast, only to slip on the wet road and end up in the sea!!.. eeesh! The car held up superbly on the 250 mile drive there & back. No problems what-so-ever, which is good news.
The timing belt which was done on the Thursday before we left didn't really change the feel of the car (not that i expected it to), but at least i knew that it wouldn't snap whilst we were down in Devon, and have to pay for the car to be either fixed there, or towed home to London!. Either way, it would have been VERY expensive.
I saw some gorgeous motor's around town & on my travels. A fair few Impreza's & Evo's. A nice looking Lotus, and some other high-powered expensive metal!
Only other news (if you can call it that), is that H's step-father has got himself a Suburu Impreza Wagon. It's the turbo model, it's black, only had 60k miles on the clock, and is around 10 years old. Bad thing though is that it's an automatic (boo hiss!). Manual's are much more fun! But he won this little gem on eBay for a shade over £2,500 which i think is an absolute steal, and at that price, i'd snap one up!... And i very nearly did until i saw the quote for the insurance... £1600 TPFT! YOUCH! Oh well, never mind though, next august, i'll be 25, and hopefully, the insurance will come down a bit!
So, in 2 week's time, H & I are off to Suffolk to see her family for a fireworks night party & i will get a chance to see the Impreza, and if i can swindle it, a nice lil drive hehe. I will definatly get some piccies!
Thursday, October 13, 2005
A few bits...
At the weekend, i visited my dad and we decided to do a few servicey bits to the car. We changed the oil & filter, and i watched his every move so now i can do it myself. We also decided to change the timing belt, however, time was not on our side, so my dad, the nice guy that he is, said to me that he'll pay for it to get done in a garage! Bonus! (thanks dad!!)
So today, the Pug has gone into the local garage to get the Timing belt replaced. I hope it'll be alright cos i'll be doing a lot of miles next week! Friday night, My girlie & i are off to Suffolk (150 miles), We may go to Norwich on Saturday (60 miles), and then sunday, we're coming back home to London (another 150 miles). Monday morning, My girlie & i are off on Holiday for the week. We're off to Devon which will be really nice! (our first holiday together). It's 230ish miles to Devon from london. Then obviously, we'll be driving around all week, which could be another 70 miles, and then next Friday, we'll be driving home again (230 miles). So over the next 8 day's, my pug will cover around 900-1000 miles! Which is a fair bit for a car which was designed for town driving.
The only reason i wanted the timing belt changed is that it's meant to be changed every 72000 miles, but the Haynes manual suggests you do it every 36000 miles! I've had the car for around 32,000 miles, but im not sure when the timing belt was last changed IF it has been changed at all. The pug is coming upto 85ooo miles, so i thought it'd best be done as soon as possible.
So the pug should be back with me by 5pm tonight!... And even though i dont drive it during the day whilst im in the office, im actually missing the car! Because it's not sat outside, it does seem very strange!... I CANT WAIT! God know's what i'll be like IF i get the engine done!
Monday, October 10, 2005
PGAC Kent meet - 9th Oct 2005
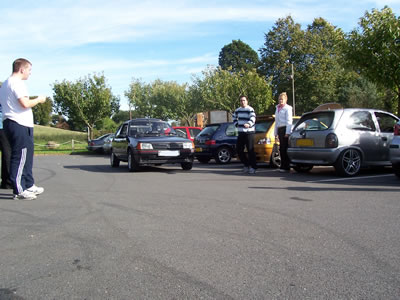
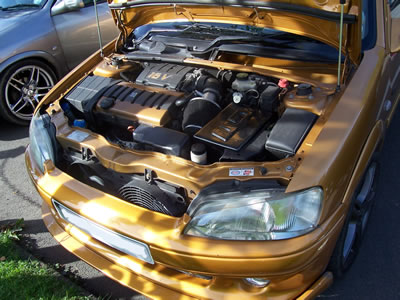
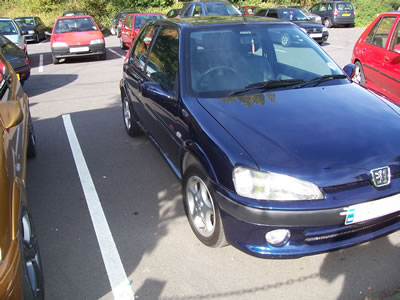
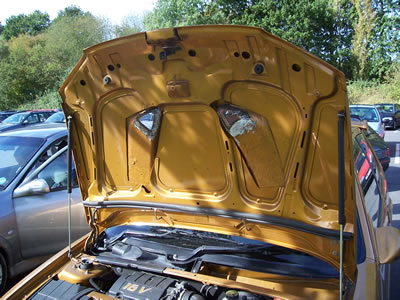
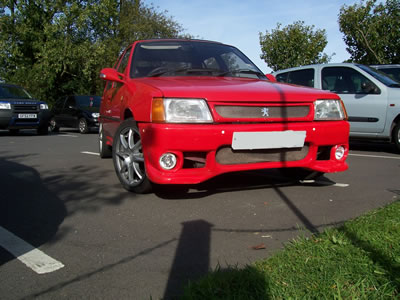
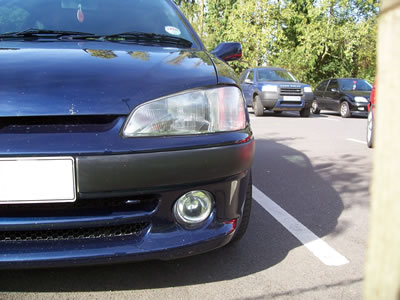
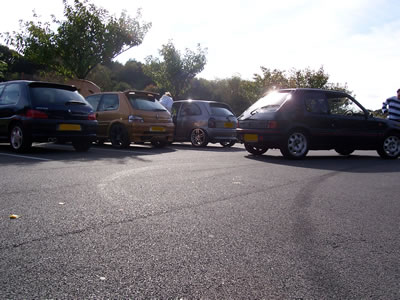
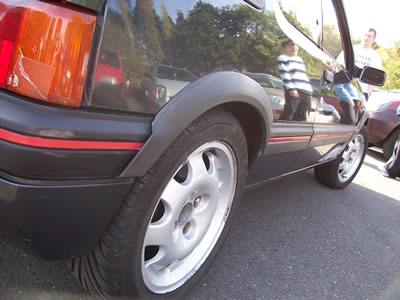
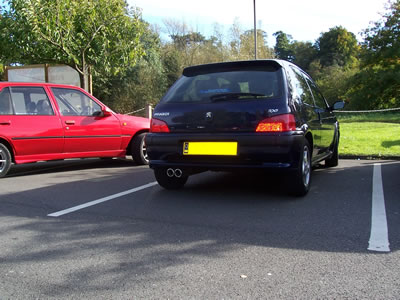
Well, i visited the PGAC Kent meet on Sunday. It was a small joint meet between Kent, Surrey & Sussex. There was a few nice car's there, i really enjoyed myself and would definatly go again!... I've made some new friends and that is always a bonus!...
Shouts to everyone who was there!... Here's the pic's


Shouts to everyone who was there!... Here's the pic's


Thursday, September 29, 2005
I really need to clean my windows
it's that time of year again. There's brown leaves fluttering to the floor, there's a chilly wind in the mornings, there's dew on car window's, and that bastid sun is rising when i go to work! This means that i cannot see a thing when im driving to work! I put my shades on to help but it doesn't work!... i really should buy some window cleaning solution...
it doesn't help that i smoke and it appears that the inside of my windscreen is now yellow from nicotine... bonus :(
it doesn't help that i smoke and it appears that the inside of my windscreen is now yellow from nicotine... bonus :(
Wednesday, September 28, 2005
Service
Spoke to my dad last night, hopefully he should be getting the bits & peices we need to do a decent service on my car. He should be getting a timing belt, an oil filter, and some oil! The car doesn't need plugs (i put some in 6 months ago), but we'll have a look at those anyway. Air Filter's also 6 months old but i'll give that a quick once over, so with a bit of luck, the car should be running better than ever on Saturday after it's been serviced.
Also whilst on the phone to my dad, we spoke about my smoked indicators. I'm now a bit weary of them because when i trial tested them the other weekend, they weren't that bright. So, what im gonna do is get the connections sorted so i can easily plug them in, and then maybe saturday night, hook them up, and test them in the dark.. If they are bright enough, they'll stay on! If not, ill pay a visit to the local Pug Dealer, and pic up some S2 clear indicators.
Other than that, not much has been going on.. i MUST get some new tyres as i checked them the other weekend, and 2 were just above the legal limit, so not long left on those now.
Oh and i heard on the PGAC that somebody managed to pick up an S1 Rallye for £30!... THIRTY POUNDS!... That would of been ideal for me! I wanna find a dog of a motor. And then cut my teeth on the mechanical side of things whilst trying to fix it lol!
Monday, September 26, 2005
Freebies
 Dont you just love freebies!... Thanks to my boss for his phone, a Sony Ericsson K700i, infrared, bluetooth, camera, video & more... Im pretty amazed by the apparant picture size of upto 1280x960. I haven't got the USB Cable for it yet, but that should be coming soon! And then i'll be able to get the photo's from the phone and see what the photo quality is like!
You see, i hate paying £200 for phones, so i try and get phones for free. I haven't bought a phone since 1999, and i've had some pretty decent phones since then! This will probably replace my Sony Ericsson P800
Plasma dials
A saw a link the other week to a german forum. One of their user's has created some plasma dials for his 205, and oh my god they look fantastic! The good thing about these dials is that the needles change colour! They are blue when the engine is running, but say when the engine is revving high and the needle reaches around 6000rpm, the needle changes to purple (strange colour!)
Now this could have many advantages. It could be ideal to warn drivers when they need to change gear (to stop the engine revving out). It could also warn drivers when the fuel is low or even, in some cases, when they are breaking the speed limit!
I dont know any german, but i ran the site through babelfish, and managed to pick up that it cost around 200 euro's and 2 weeks to build!
I'd love to know how it was done!!!
Have a look at the post here > Peugeotforum.net
My weekend
Well as i said on Friday, "H" and i went to Suffolk. The M25 wasn't bad at all, didn't get caught in much traffic and pretty much sailed through although the Toll just before the tunnel was a bit packed. The A12 was a bit of a nightmare though. A lot of traffic around colchester, but once we past that, it was nice & easy!
Saturday was fun, "H"'s brother 'colcoomagnumar' left for University in Norwich (the UEA). We packed up most of his stuff in my car which surprised a few people mainly because of how much stuff we got in my car. We had a small chest of drawers, a quilt, a bag of shoes, a few books, a whole computer system, a couple of boxes of paperwork & a box of cutlery, kitchen utensils, pillows etc.. oh & 3 people in the car! I was amazed at how big the University is! It's absolutly huuuge! But once we got there, he had signed in and got his key, we drove over to the campus and unloading his stuff into his room! Hopefully, he'll get on well there!
And sunday, we drove back home. Got stuck behind a tractor, and a bunch of drivers who didn't know what the speed limit was so decided to do 30 down an NSL (50/60mph) which annoyed me, but after that, the A12 was fine. The only other trouble we had was the M25. I didnt notice the signs saying there was delays so we drove straight into a long que of vehicles, which we sat in for an hour :(.
Oh, and a guy had come off his motorbike just after Junction 4. I just hope to god he's fine!
Friday, September 23, 2005
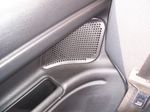
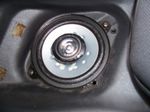
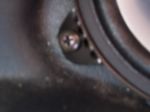
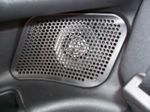
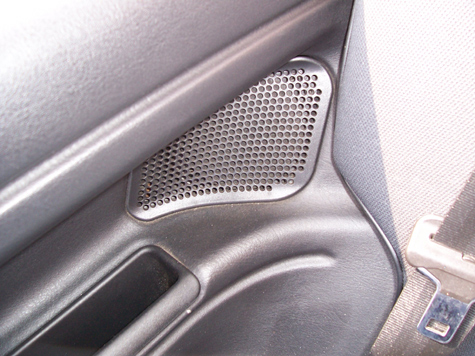
GUIDE: Fitting front speakers
The Standard speakers in the 106 are a bit poor. It kinda matches the rest of the system. Here I will be showing you how to replace the front speakers of your 106.
The front speakers on an S1 106 measure about 5 inches in diameter. Take care though as the 106 is a small car, and the door pod’s aren’t exactly forgiving when it comes to space. Like the rear of the car, try to get some good quality speakers which are quite thin so they can fit in the door pods and move accordingly. It’s no good if the magnet at the rear of the speaker is touching the door as it will sound awful, and no doubt kill your speaker within a couple of weeks! Not good!
Note: For those with an S2 106, I believe the speakers / door pockets are held in with rivets.These will probably need to be drilled out rather than unscrewed!
YOU WILL NEED
1 x torx screwdriver
1 x flat head screwdriver
1 x Philips head screwdriver
Unfortunatly, there are no pictures for this guide, as this was done before the site was started.
1) First, clear out the door pockets of your 106 as you’ll be removing these, and you don’t want everything falling out onto the floor.
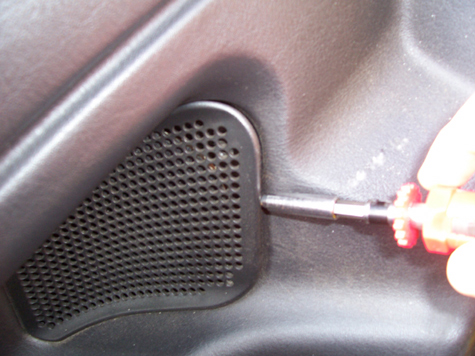
2) Now grab your philips screwdriver, and remove the screws from around the door pocket.Once these have been removed, the whole door pocket & speaker cover should come off.
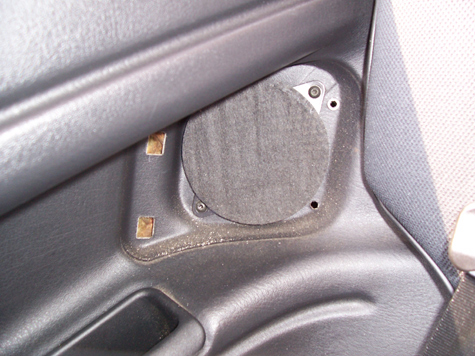
3) Grab your torx head screw driver.Unscrew the 4 screws around the old speakers, and pull them out of their pods.
4) Remove the spade connections from the speakers, and place them (same way round) on your new speakers.
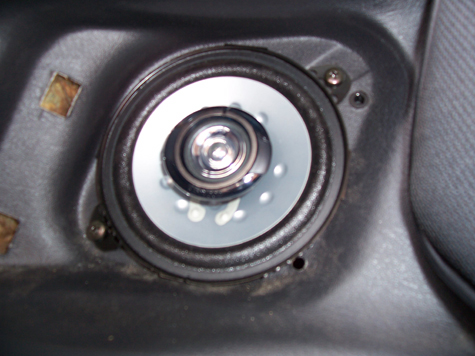
5) Turn on your Head unit and test the speakers to make sure they work! It’s no good fitting your new speakers, and putting everything back together if the speakers don’t work!
6) If the new speakers work ok, put the speakers back in the pods, and screw them into place. (if your speakers come with new screws, it might be an idea to use these instead of the torx ones), and then screw the door pocket back onto the door. Now repeat on the otherside!
7) Sit back and enjoy the sounds of your brand new speakers. Pat yourself on the back, cos the job’s a good’un!
The front speakers on an S1 106 measure about 5 inches in diameter. Take care though as the 106 is a small car, and the door pod’s aren’t exactly forgiving when it comes to space. Like the rear of the car, try to get some good quality speakers which are quite thin so they can fit in the door pods and move accordingly. It’s no good if the magnet at the rear of the speaker is touching the door as it will sound awful, and no doubt kill your speaker within a couple of weeks! Not good!
Note: For those with an S2 106, I believe the speakers / door pockets are held in with rivets.These will probably need to be drilled out rather than unscrewed!
YOU WILL NEED
1 x torx screwdriver
1 x flat head screwdriver
1 x Philips head screwdriver
Unfortunatly, there are no pictures for this guide, as this was done before the site was started.
1) First, clear out the door pockets of your 106 as you’ll be removing these, and you don’t want everything falling out onto the floor.
2) Now grab your philips screwdriver, and remove the screws from around the door pocket.Once these have been removed, the whole door pocket & speaker cover should come off.
3) Grab your torx head screw driver.Unscrew the 4 screws around the old speakers, and pull them out of their pods.
4) Remove the spade connections from the speakers, and place them (same way round) on your new speakers.
5) Turn on your Head unit and test the speakers to make sure they work! It’s no good fitting your new speakers, and putting everything back together if the speakers don’t work!
6) If the new speakers work ok, put the speakers back in the pods, and screw them into place. (if your speakers come with new screws, it might be an idea to use these instead of the torx ones), and then screw the door pocket back onto the door. Now repeat on the otherside!
7) Sit back and enjoy the sounds of your brand new speakers. Pat yourself on the back, cos the job’s a good’un!
Damn that infernal M25
Well it's started raining here. This will mean my trip tonight will be a nightmare. We're off to Lowestoft, Suffolk to visit family, and this means spending about an hour on the M25 before hitting the A12.
But you see, in the UK, when the rain comes, so does the traffic & the bad driving!.. Last time we done the trip, we spent 3 hours on the M25!... Wish me luck wont you!
But you see, in the UK, when the rain comes, so does the traffic & the bad driving!.. Last time we done the trip, we spent 3 hours on the M25!... Wish me luck wont you!
Guide: De-badging your 106
You can make a hell of a difference to the rear of your 106 by removing the “Peugeot” and “106” badges. This gives a really nice smooth look to the rear. Some people then prefer to remove the rear lock as well to give that full smooth finish, where as others like to place the newer style chrome badges from the s2 106.
This guide will show you how to remove the badges. Then it’s up to you what you do next!
Unfortunatly, there’s no pictures with this guide. I carried this mod out a few years back before this site was even thought of!
YOU WILL NEED
1 x kettle of boiling water
1 x piece of strong nylon / cotton wool / fishing tackle wire.
1 x bottle of T-Cut
1 x cloth
NOTE: My car is bright cherry red.The car was about 8 years old when I done this mod, and unfortunately, red is the wrong colour to be starting with, as you can still make out the badges from where the paint on the boot had faded, but the paint under the badges has stayed as bright as the day it came out of the factory!
1) First off, get the kettle on!
2) Whilst the kettle is boiling, give the back of the car a good clean! The cleaner it is, the better & easier it is to work with.
3) Now once you’ve finished cleaning the car, and the kettle’s boiled, unplug it, and walk out to the car. Pour a good amount of hot water over the badges (it may be an idea to work on one badge at a time). The heat from the boiling water will melt the glue that's holding the badges onto the bodywork.
4) Grab your super-strength cotton / fishing wire (or similar - but dont use any metal wire as this will ruin your paint) and slide it behind the badges. If it doesn’t glide through easily, use a cutting motion to grind the cotton / wire through the glue. If it still feels quite difficult, pour some more boiling water over the badges. This melts the glue.
5) Once the badges have been removed, you’ll need to get rid of the last few bits of glue.
T-Cut should do the trick! (I cant remember if I used anything else!)
6) Once you’ve T-cut out the rest of the glue, give it another coat to try and colour match the paintwork!
7) Now stand back and admire, give yourself a pat on the back, as the job’s a good’un!

Thursday, September 22, 2005
Fuel guage
I've really gotta fix my fuel guage. When it get's near empty, the guage stop's working, and will only start working again when i fill up!
I've had this problem before, and it turned out to be the sensor in the fuel tank had broke, so my dad & I fixed it... But it seems the problem is back!
I've had this problem before, and it turned out to be the sensor in the fuel tank had broke, so my dad & I fixed it... But it seems the problem is back!
Tuesday, September 20, 2005
GUIDE: Fitting rear speakers
This is an old guide which i wrote last year, and it has been on the PGAC website since then, but i thought i'd post it up here too!
PROLOGUE
Standard Peugeot speakers aren't that great, to be honest. I replaced my head unit 2 years ago, and replaced my front speakers 18 months ago, and that has really boosted the sound in my 106, which is great, but the back speakers have always let it down. So my girlfriend got me a set of 10CM Kenwood speakers for my birthday. Here's how to fit them. They have been fitted to a 1994 Peugeot 106 Mk1 3dr Model.
The 106 is a small car, and the space where the rear speakers go is very very TIGHT. So be careful when you purchase your speakers, as if they are too deep, they wont fit properly. My old speakers, i think, measured about 40mm, however the new ones are around 50-60mm.
Please don't take my measurements as exact though. I don't want to be held responsible for you buying speakers that won't fit. Thank you.
What you will need:
2 x 10cm Speakers
1 x torx screw driver
1 x flat headed screwdriver
1 x philips screwdriver
Step 1:
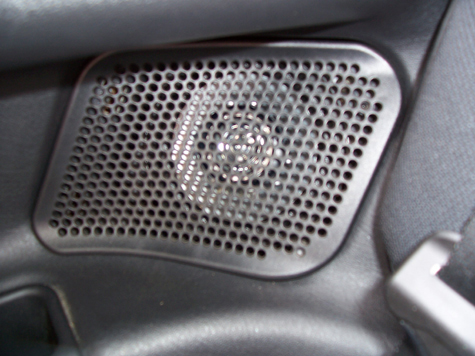
The first step is to remove the grills from the rear of the car. Grab your flat headed screwdriver and slot that in between the speaker grille and the plastic that the speaker sits in. Give it a bit of pressure, and the speaker grille should simply pop out. As I said before, it's very tight back there, so you may want to pull the back seat down so you can get easier access to the grill.

Step 2:
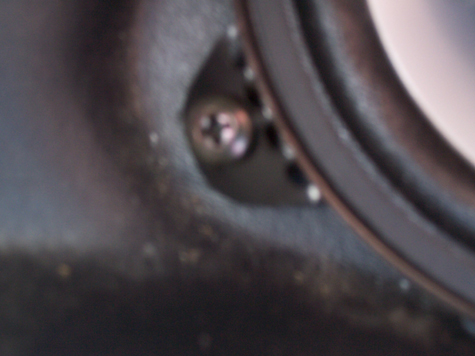
The speakers are held in with screws with a star shaped head on them, so grab the star headed screwdriver. I'm not sure what size you will need. Remove the screws, and then pull the speaker out.

Step 3:
On the back of the standard Pug speakers is a yellow block which holds the connections onto the speaker. This should simply pull apart (you may need to use a small flat headed screwdriver here). So now you should have a redundant Pug speaker and a speaker wire hanging out of the hole with a yellow connecter on the end.
Grab the yellow connecter which is connected to the speaker wire. If you look at the end of it, you can see 2 spade connectors held in the yellow block. Grab a small flat headed screwdriver and push it down the end of the connector so the spade connections pop out.
Step 4:
Now is the moment of truth. Are the speakers you bought too big?
Grab the 2 spade connectors which are on the end of the speaker wire. Plug these into the connectors on the back of your new speaker. Slot the speaker back into the speaker recess where the standard speaker sat.
Does it fit nice & flush? If so, well done!! At this stage, my speakers where too deep, but I still fitted them anyway in the hope of constructing a "Custom pod" for the speakers at a later date.
At this point, it would be best to turn your head unit on and test the speaker. After all you don't want to fit it all in, switch it on and find out it doesn't work!!!
Step 5:
So, if the speaker fits nice & flush, grab the screws which came with the new speakers, and screw them into the holes the old speaker left. If your speakers didn't come with screws, then use the old ones that held the old speakers in.
Step 6:
Once it's all in, re-fit the speaker grill and start on the other side. It's exactly the same!
Step 7:
Once both speakers have been fitted, sit back, switch the stereo on, and enjoy the enhanced sound!
Final Thoughts:
My speakers where too deep for the existing holes, but I fitted them regardless. The magnet at the back of the speaker is currently touching on the bodywork and doesn't actually fit properly in the speaker hole. Also, only one screw would completely screw in as the speaker is too deep. Because of this, the speaker grills wont fit on either. So please be careful!
Aftermath
When i fitted these speakers, i mentioned that i had problems with the depth and the speaker magnets where actually touching the bodywork. After a couple of days, i decided i didnt want to ruin the speakers, so i had a quick word with my boss about the problem, and he came up with some plastic tubing which i butchered to create some spacers.

These 4 rings which look like polo mints went between the speaker & the panels in the back of the car. They are about 5/6mm deep and give enough clearance for the speaker to move how it should.
Note: This is the way i carried out this mod. It may be different for you. i will not be held responsible if there is a problem or any damage caused to your vehicle if you follow this guide. You carry out anywork at your own risk!
PROLOGUE
Standard Peugeot speakers aren't that great, to be honest. I replaced my head unit 2 years ago, and replaced my front speakers 18 months ago, and that has really boosted the sound in my 106, which is great, but the back speakers have always let it down. So my girlfriend got me a set of 10CM Kenwood speakers for my birthday. Here's how to fit them. They have been fitted to a 1994 Peugeot 106 Mk1 3dr Model.
The 106 is a small car, and the space where the rear speakers go is very very TIGHT. So be careful when you purchase your speakers, as if they are too deep, they wont fit properly. My old speakers, i think, measured about 40mm, however the new ones are around 50-60mm.
Please don't take my measurements as exact though. I don't want to be held responsible for you buying speakers that won't fit. Thank you.
What you will need:
2 x 10cm Speakers
1 x torx screw driver
1 x flat headed screwdriver
1 x philips screwdriver
Step 1:
The first step is to remove the grills from the rear of the car. Grab your flat headed screwdriver and slot that in between the speaker grille and the plastic that the speaker sits in. Give it a bit of pressure, and the speaker grille should simply pop out. As I said before, it's very tight back there, so you may want to pull the back seat down so you can get easier access to the grill.
Step 2:
The speakers are held in with screws with a star shaped head on them, so grab the star headed screwdriver. I'm not sure what size you will need. Remove the screws, and then pull the speaker out.
Step 3:
On the back of the standard Pug speakers is a yellow block which holds the connections onto the speaker. This should simply pull apart (you may need to use a small flat headed screwdriver here). So now you should have a redundant Pug speaker and a speaker wire hanging out of the hole with a yellow connecter on the end.
Grab the yellow connecter which is connected to the speaker wire. If you look at the end of it, you can see 2 spade connectors held in the yellow block. Grab a small flat headed screwdriver and push it down the end of the connector so the spade connections pop out.
Step 4:
Now is the moment of truth. Are the speakers you bought too big?
Grab the 2 spade connectors which are on the end of the speaker wire. Plug these into the connectors on the back of your new speaker. Slot the speaker back into the speaker recess where the standard speaker sat.
Does it fit nice & flush? If so, well done!! At this stage, my speakers where too deep, but I still fitted them anyway in the hope of constructing a "Custom pod" for the speakers at a later date.
At this point, it would be best to turn your head unit on and test the speaker. After all you don't want to fit it all in, switch it on and find out it doesn't work!!!
Step 5:
So, if the speaker fits nice & flush, grab the screws which came with the new speakers, and screw them into the holes the old speaker left. If your speakers didn't come with screws, then use the old ones that held the old speakers in.
Step 6:
Once it's all in, re-fit the speaker grill and start on the other side. It's exactly the same!
Step 7:
Once both speakers have been fitted, sit back, switch the stereo on, and enjoy the enhanced sound!
Final Thoughts:
My speakers where too deep for the existing holes, but I fitted them regardless. The magnet at the back of the speaker is currently touching on the bodywork and doesn't actually fit properly in the speaker hole. Also, only one screw would completely screw in as the speaker is too deep. Because of this, the speaker grills wont fit on either. So please be careful!
Aftermath
When i fitted these speakers, i mentioned that i had problems with the depth and the speaker magnets where actually touching the bodywork. After a couple of days, i decided i didnt want to ruin the speakers, so i had a quick word with my boss about the problem, and he came up with some plastic tubing which i butchered to create some spacers.

These 4 rings which look like polo mints went between the speaker & the panels in the back of the car. They are about 5/6mm deep and give enough clearance for the speaker to move how it should.
Note: This is the way i carried out this mod. It may be different for you. i will not be held responsible if there is a problem or any damage caused to your vehicle if you follow this guide. You carry out anywork at your own risk!
Monday, September 19, 2005
RIP Michael Park
Michael Park, co-driver of one of the Peugeot 307's, has unfortunatly passed away after an accident which took place on Stage 15 at the "Wales rally GB" over the weekend.
RIP Michael Park
RIP Michael Park
It is with deep reget that the organisers of Wales Rally GB confirm that Michael Park (39) of Newent, Gloucestershire, UK, co-driver in car number 8 has been fatally injured following an accident in Special Stage 15, Margam.
oh yeah!
I also trial fitted my smoked side indicators yesterday. Still trying to figure out how to go about re-wiring them so they fit in with the standard pug connectors, but they work which is good...They dont seem very bright though :(
Could be because it was daylight, but i may trial fit them again in the dark to see how it looks!
Could be because it was daylight, but i may trial fit them again in the dark to see how it looks!
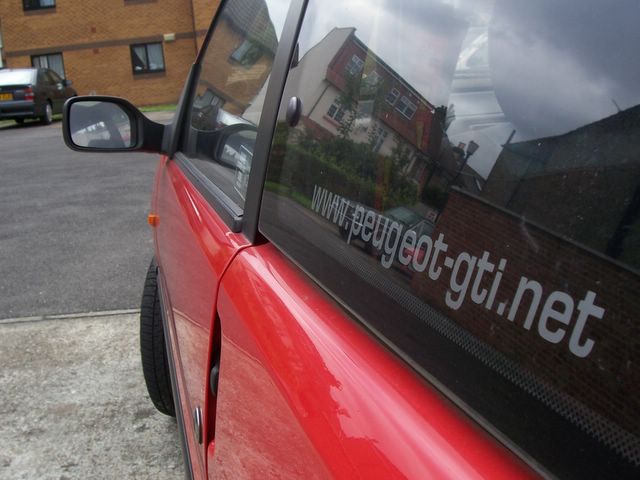
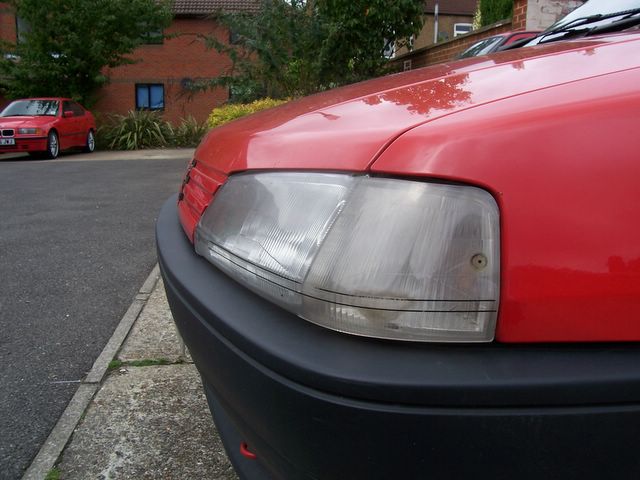
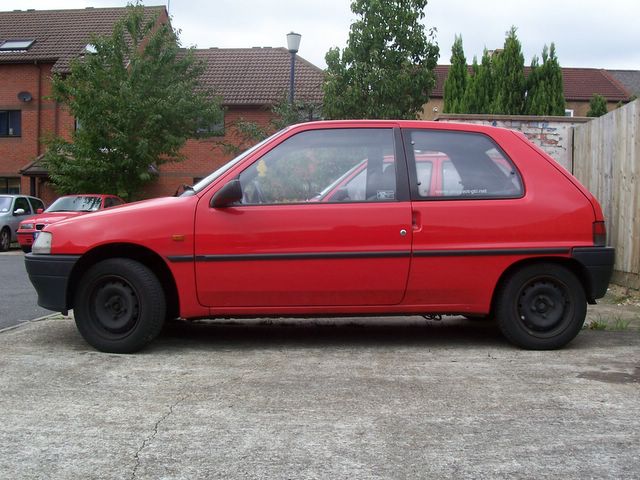
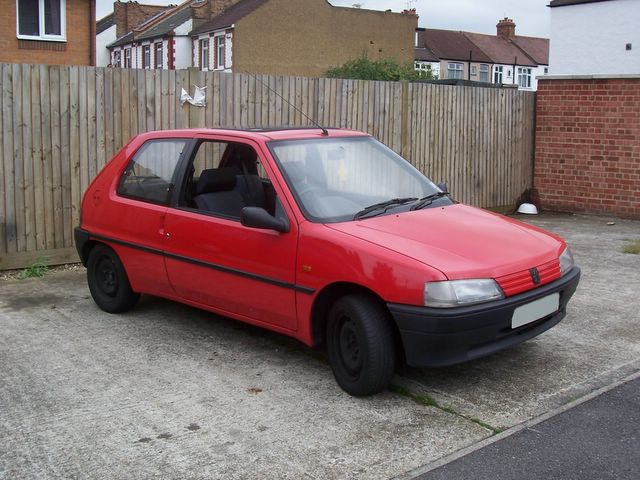
Pictures of my 106
Whilst i was fitting my gaiter yesterday, i had my camera with me so i thought i'd take some piccys of my peugeot... Not much to look at, but hopefully, over time, she will improve!
On another note, i saw a set of 306 GTi-6 Cyclones go on eBay for £80!... EIGHTY POUNDS! Seeing as they usually go for well over £200. I would of bidded on them, but im off on holiday next month with "H", and money needs to be saved! Ho hum, im sure there will be another set soon... i hope!


On another note, i saw a set of 306 GTi-6 Cyclones go on eBay for £80!... EIGHTY POUNDS! Seeing as they usually go for well over £200. I would of bidded on them, but im off on holiday next month with "H", and money needs to be saved! Ho hum, im sure there will be another set soon... i hope!


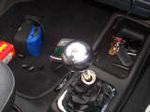
ba da ba ba baa... im lovin' it
Gotta say im lovin that new gear knob.. Feels so much better whilst changing gear =)
Sunday, September 18, 2005
GUIDE: Fitting a gear knob & gaiter
Changing the original gear knob & rubber gaiter for a different item can be quite difficult, but hopefully, with this guide, it should make it a lot easier.
First off, it all depends on what sort of set-up you already have in your car. My car had a standard gear knob which was attached to a rubber gaiter. This looked poor and frankly, i dont know why it took me so long to replace it seeing as i had a Momo gearknob for over a year. But if you have a rubber gaiter like mine, you will need a new gaiter (leather's nice!) and a gaiter surround to affix to the centre console. This will hold your gaiter in place. These items can be bought from eBay for about £20 for the lot.
The tool's you will need are:
1 x torx screw driver (6-star head)
1 x allen key (supplied with the gear knob)
1 x philips screw driver
1 x stanley knife or other sharp implement.

Let's get started!
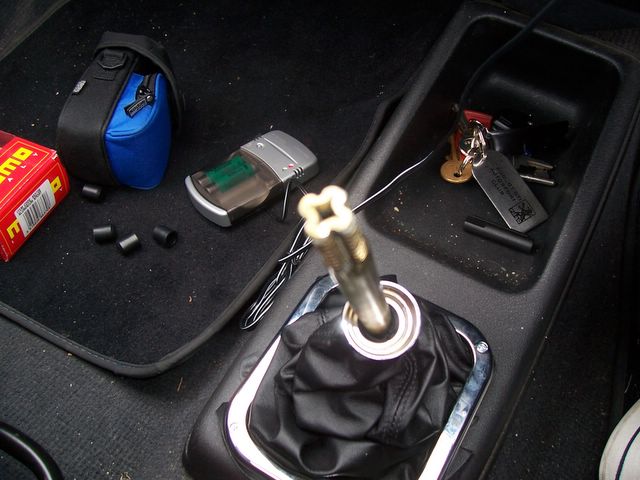
1) First thing you'll need to do is to remove the existing gear knob. Many people have trouble with this, trying to remove it using brute force, and some even resorting to cutting it off using a hacksaw.


2) Next up, grab your new gaiter and place it over the gear shaft. Now once you have it in place, grab your gaiter surround. Slide that over the gaiter and line up the holes in the bottom of the gaiter with the holes in the surround. It may help to screw in the gaiter surround screws half way so you can hook the gaiter over the screws to save messing about trying to line up the screws with the holes.

3) Screw the screws down into the centre console going through the gaiter & the gear surround. Once all the screws are done you can move onto the knob.

4)Depending on what gear knob you've purchased depends on how you affix it to your gear knob. My gear knob was a chrome ball shaped momo item. The bottom screws off to reveal 3 grub screw holes. unscrew the bottom of the knob and place this over the shaft.


5) My Momo knob came with 5 rubber grips which slip over the top of the gear shaft. Grab the one that fits tightly.


6) Now place the gear knob over the shaft. Line it up properly (it's the little things that count!) and when it's all lined up, grab your allen key and screw in the 3 small grub screws. This will hold the gear knob in place.

7) Now grab the bottom of the gear knob, and screw it back onto the actual gear knob.
8) Lastly, just to tidy things up, due to the cheap materials, there was a small bit of left-over leather which protruded from under-neath the gear surround. Grab a sharp implement like a stanley knife and cut any excess leather. This will give a clean finish.
It should all be done now. Sit back & enjoy. Give yourself a pat on the back as the job's a good'un!

Conclusion:
Well im glad i finally done this mod, it makes the interior feel a bit better. I may purchase another gaiter at a later date, as im not entirely happy with the one i got. that's cheap eBay stuff for you. It'll also help if i had removed the centre console as it can be a bit tight for space.
But overall, an easy mod, took me about an hour to do!
Note: This is the way i carried out this mod. It may be different for you. i will not be held responsible if there is a problem or any damage caused to your vehicle if you follow this guide. You carry out anywork at your own risk!
First off, it all depends on what sort of set-up you already have in your car. My car had a standard gear knob which was attached to a rubber gaiter. This looked poor and frankly, i dont know why it took me so long to replace it seeing as i had a Momo gearknob for over a year. But if you have a rubber gaiter like mine, you will need a new gaiter (leather's nice!) and a gaiter surround to affix to the centre console. This will hold your gaiter in place. These items can be bought from eBay for about £20 for the lot.
The tool's you will need are:
1 x torx screw driver (6-star head)
1 x allen key (supplied with the gear knob)
1 x philips screw driver
1 x stanley knife or other sharp implement.

Let's get started!
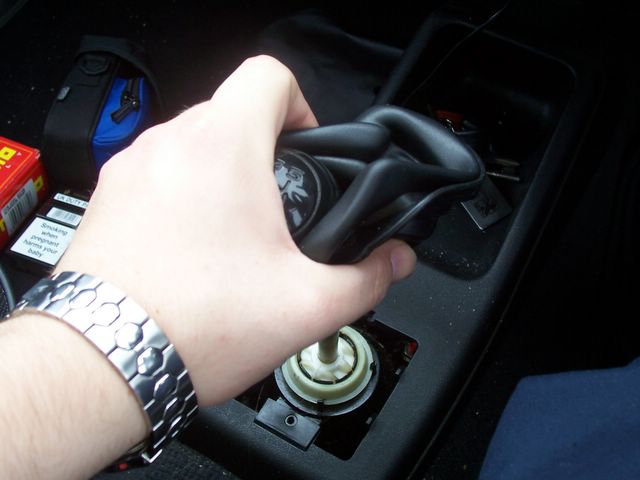
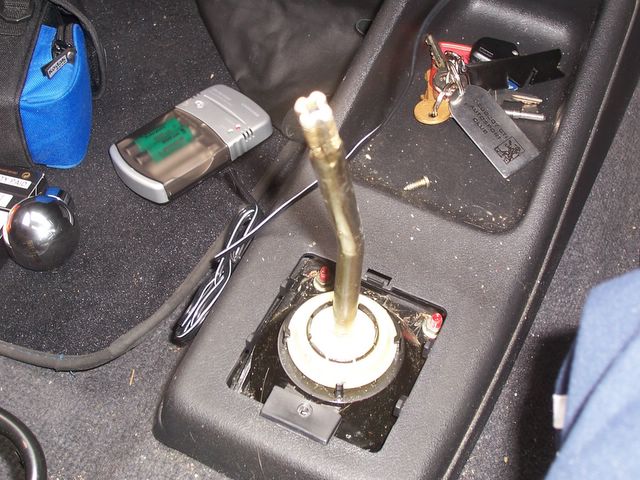
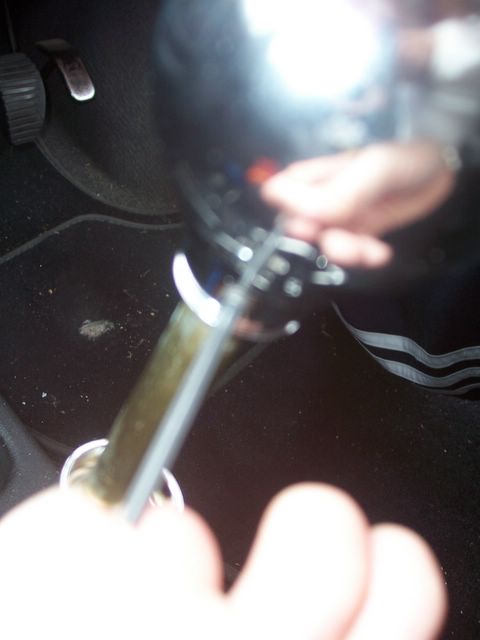
1) First thing you'll need to do is to remove the existing gear knob. Many people have trouble with this, trying to remove it using brute force, and some even resorting to cutting it off using a hacksaw.
Grab your torx screwdriver (star shaped head with 6 points). Lift the rubber gaiter at the bottom closest to the handbrake. This will reveal a gold torx screw. Undoing this will release the gaiter along with the centre console.
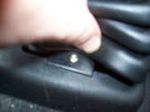
Now to remove the gear knob. Pull the gaiter up so it covers the gear knob so it covers the gear knob (this helps with grip!), and twist it anti-clockwise. This will require some force, but once it starts to move, it will move. You only need to twist is 90 degrees anti-clockwise. Once it twists 90 degrees, lift the gear knob off the shaft.
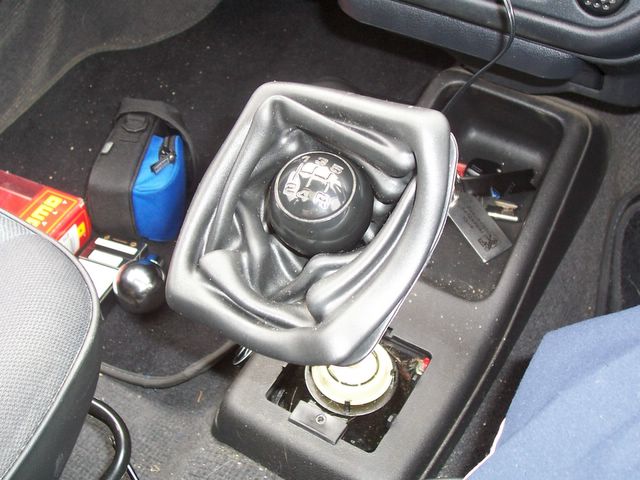
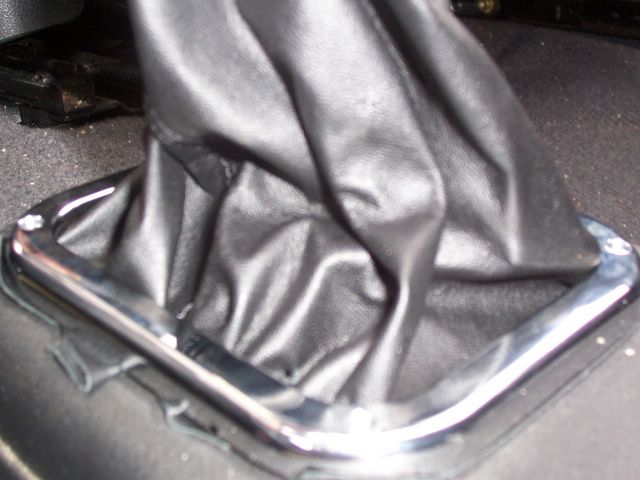
2) Next up, grab your new gaiter and place it over the gear shaft. Now once you have it in place, grab your gaiter surround. Slide that over the gaiter and line up the holes in the bottom of the gaiter with the holes in the surround. It may help to screw in the gaiter surround screws half way so you can hook the gaiter over the screws to save messing about trying to line up the screws with the holes.

3) Screw the screws down into the centre console going through the gaiter & the gear surround. Once all the screws are done you can move onto the knob.
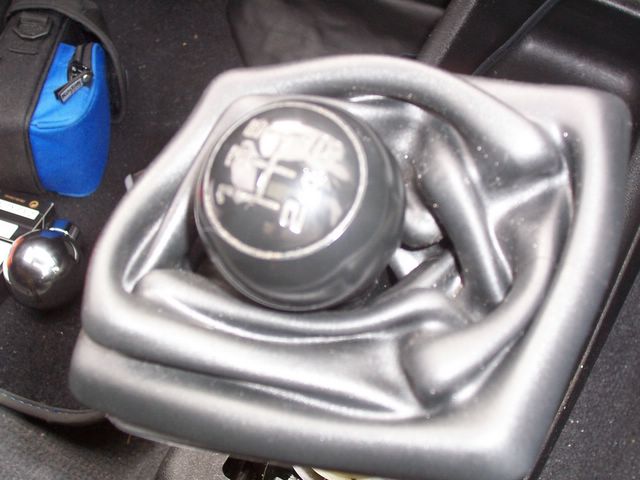
4)Depending on what gear knob you've purchased depends on how you affix it to your gear knob. My gear knob was a chrome ball shaped momo item. The bottom screws off to reveal 3 grub screw holes. unscrew the bottom of the knob and place this over the shaft.
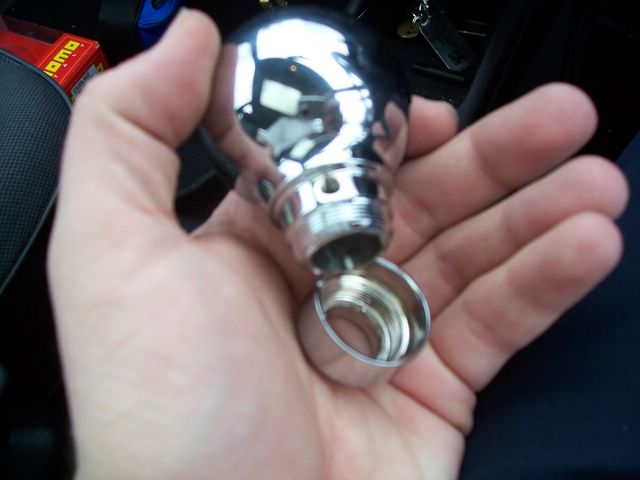
5) My Momo knob came with 5 rubber grips which slip over the top of the gear shaft. Grab the one that fits tightly.

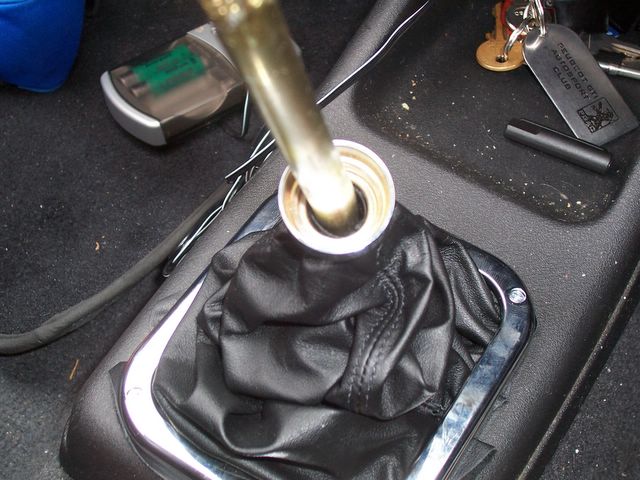
6) Now place the gear knob over the shaft. Line it up properly (it's the little things that count!) and when it's all lined up, grab your allen key and screw in the 3 small grub screws. This will hold the gear knob in place.

7) Now grab the bottom of the gear knob, and screw it back onto the actual gear knob.

8) Lastly, just to tidy things up, due to the cheap materials, there was a small bit of left-over leather which protruded from under-neath the gear surround. Grab a sharp implement like a stanley knife and cut any excess leather. This will give a clean finish.
It should all be done now. Sit back & enjoy. Give yourself a pat on the back as the job's a good'un!

Conclusion:
Well im glad i finally done this mod, it makes the interior feel a bit better. I may purchase another gaiter at a later date, as im not entirely happy with the one i got. that's cheap eBay stuff for you. It'll also help if i had removed the centre console as it can be a bit tight for space.
But overall, an easy mod, took me about an hour to do!
Note: This is the way i carried out this mod. It may be different for you. i will not be held responsible if there is a problem or any damage caused to your vehicle if you follow this guide. You carry out anywork at your own risk!
Subscribe to:
Posts (Atom)


